To construct a lightweight backpacking shelter, select durable material such as silnylon or Dyneema Composite Fabric (DCF). Measure and cut accurately, sew flat-felled seams, and strengthen stress points. Add tie-out loops and a pole loop for stability. Double fold material for hems and attach loops strategically. Include reinforcement patches and a beak for added protection. Master pole placement and adjust guyline tension for stability. Enhance comfort and durability with bathtub floors, seam sealer, high-quality zippers, and UV-resistant coatings. These steps guarantee a dependable shelter for your outdoor adventures.
Key Takeaways
- Choose durable fabrics like silnylon or DCF.
- Sew with precision using flat-felled seams.
- Add reinforcement patches for longevity.
- Properly set up poles and adjust tension.
- Enhance comfort with bathtub floors and seam sealer.
Selecting the Right Fabric
When selecting the fabric for your lightweight backpacking shelter, choose durable materials like silnylon or Dyneema Composite Fabric (DCF) to guarantee a balance of strength and weight savings. Silnylon is a popular choice for its water resistance, tear strength, and light weight, making it an excellent option for your tent.
If you're looking for even lighter and stronger fabric, DCF is the way to go, especially for ultralight backpacking shelters. Another reliable choice is ripstop nylon, known for its durability and tear resistance, which is essential for the longevity of your shelter.
When considering the fabric for your tent, keep in mind factors like weight, waterproofing, breathability, and UV resistance to make sure that your shelter isn't only lightweight but also protective and sturdy. Choosing the right fabric is critical as it will determine the overall performance and durability of your shelter, so take your time to select the best material for your sewing project.
Cutting and Preparing the Fabric
For precise and accurate sizing of your lightweight backpacking shelter, make sure that the fabric is cut with utmost precision and care. Begin by measuring and cutting the fabric according to your shelter's design specifications. Use sharp fabric scissors to guarantee clean edges that will later be sewn with a flat-felled seam for added durability. When sewing the second, double folded hem, make sure to press it thoroughly to create a neat and professional finish that prevents fraying during use in the outdoors.
Consider reinforcing stress points on the fabric with additional patches to increase the shelter's longevity and resistance to wear and tear. Including tie-out loops and a pole loop in the fabric design will provide secure pitching and stability when setting up the shelter in various terrains. Choosing a fabric width of at least 58 inches guarantees sufficient coverage and protection, especially in challenging weather conditions during your backpacking adventures. Remember, attention to detail in cutting and preparing the fabric is vital for a well-constructed and reliable lightweight shelter.
Sewing Hems and Attach Loops
When sewing hems on your shelter edges, make sure the fabric is double folded for added strength and a neat appearance.
Attaching loops at stress points is crucial to evenly distribute tension and provide a secure setup.
Remember to angle loops at corners for proper tension and stability during your outdoor adventures.
Sewing Techniques for Hems
To achieve a clean and durable finish for your lightweight backpacking shelter, master the art of sewing hems and attaching loops with precision and strength.
When sewing hems, your sewing experience will guide you in creating double-folded hems that provide a polished look and prevent fraying, especially in lightweight fabrics.
To reinforce loops, secure them with strong stitches to evenly distribute stress. Enhance the strength and longevity of your shelter by reinforcing loops with multiple passes of stitching.
These sewing techniques are important for constructing a lightweight shelter with durable components. Remember, attention to detail and practice will guarantee your hems and loops aren't only functional but also aesthetically pleasing.
Adding Loops Securely
Securely attaching loops to your lightweight backpacking shelter involves precise stitching that evenly distributes stress, ensuring durability and reliability in various conditions.
To make sure your loops are robust, it's a good idea to sew double folded hems along the edges where the loops will be attached. This technique not only provides a clean finish but also adds strength to the loops, spreading the stress across a wider area.
By hemming the fabric before attaching the loops, you prevent fraying and reinforce the attachment points, making your shelter more resilient.
Using durable thread and reinforcing stitches further enhances the longevity of the loops, preventing tears or failures during tensioning and use.
Equipment for Attachment
Ensuring your lightweight backpacking shelter is equipped properly for attachment involves selecting the appropriate tools for sewing hems and attaching loops securely. Here are three essential items to contemplate:
- Trekking Pole: Use a sturdy trekking pole to create a central support for your shelter, providing stability and structure.
- Guy Line: Attach guy lines to the loops on your shelter to anchor it securely to the ground, preventing it from shifting in windy conditions.
- Stake Loops: Reinforce the corners of your shelter with stake loops, allowing you to secure it firmly to the ground with stakes, enhancing overall stability.
Adding Reinforcement Patches and Beak
Enhance the durability of your lightweight backpacking shelter by strategically adding reinforcement patches in high-stress areas. These patches, when sewn securely, can prevent tears and wear at critical points of the shelter. Consider placing them at the corners and along seams where tension is concentrated, reinforcing the fabric for longevity.
In addition to reinforcement patches, incorporating a beak can offer extra protection against harsh weather conditions. Beaks are angled extensions that help deflect wind and water away from the shelter entrance, providing increased coverage and sheltered space. When attaching the beak, make sure it's firmly sewn to the shelter, enhancing its overall performance.
Setting Up and Adjusting Tension
When arranging your shelter, guarantee proper pole placement for maximum stability. Adjust guyline tension by tightening or loosening them to achieve a taut pitch.
Regularly check the shelter's stability by confirming the angle of the guy lines and readjusting as necessary.
Pole Placement Tips
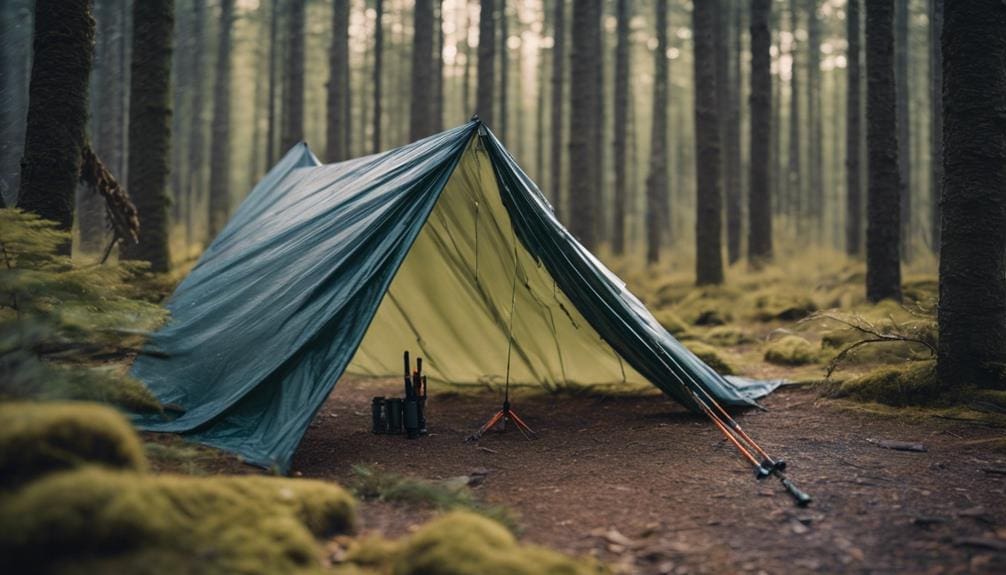
To achieve a stable and secure shelter when backpacking, strategically place your trekking poles at the front corners and center of the front, ensuring ideal tension for a taut pitch. Here are essential pole placement tips:
- Corner Support: Position your trekking poles at the front corners of your shelter to provide sturdy support and maintain the structure's shape.
- Center Stability: Placing a pole at the center of the front helps distribute tension evenly along the shelter, preventing any sagging in the middle.
- Taut Pitch: Adjust the height of your poles to create proper tension in the shelter fabric, ensuring a firm pitch that can withstand varying weather conditions and provide excellent protection.
Guyline Tensioning Techniques
For peak stability in your lightweight backpacking shelter, mastering effective guyline tensioning techniques is crucial. Start by securing the front edge and back corners of your shelter with guylines. Use easy-to-make adjustments like the taut-line hitch to keep the lines taut.
This technique allows for quick modifications to adapt to changing wind or terrain conditions. Consider using cord tensioners or LineLocs to streamline the tensioning process. Make sure to maintain consistent tension across all guyline points to evenly distribute stress and enhance overall shelter stability.
Shelter Stability Checks
To guarantee peak stability of your lightweight backpacking shelter, start by performing thorough shelter stability checks during the setup process. Here are three key steps to make sure your shelter stays secure:
- Check guy lines: Ensure correct tension to prevent sagging and enhance stability in windy conditions.
- Adjust stake placement: Create ideal angles for tension and structural support by adjusting stake positions.
- Inspect and readjust: Regularly check and readjust tent stakes to maintain tautness and prevent shifting during use.
Enhancements for Comfort and Durability
How can you enhance the comfort and durability of your lightweight backpacking shelter for best performance in various conditions?
To start, consider adding bathtub floors to your shelter to prevent water seepage and increase comfort, especially during rainy weather. Strengthening shelter seams with seam sealer is another vital step to boost durability and prevent water leakage, ensuring a dry and cozy interior.
Opting for high-quality zippers in your shelter construction is essential for smooth operation and longevity, as they're less likely to snag or break during use. Additionally, applying UV-resistant coatings on shelter fabrics can prolong material lifespan and protect against sun damage, increasing the overall durability of your shelter.
Frequently Asked Questions
Is 4 Lbs Heavy for a Backpacking Tent?
4 lbs for a backpacking tent is heavy. In ultralight circles, it's considered a burden. Lighter options at 2 lbs or less improve comfort and mobility. Choosing a lightweight tent is essential for a better backpacking experience.
How Much Does an Ultralight Shelter Weigh?
When considering ultralight shelters, focus on shelter materials like silnylon, cuben fiber, or Dyneema Composite Fabric. These materials offer durability and protection while keeping weight low. Design considerations such as weight distribution and compactness are essential for efficiency.
How Much Should an Ultralight Backpacking Tent Weigh?
When choosing an ultralight backpacking tent, consider a weight range of 1.5 to 3 pounds. Look for gear recommendations, a comparison chart, and packing tips to help you make the best choice for your outdoor adventures.
Can I Use Tyvek as a Tarp?
Yes, you can use Tyvek as a tarp. It offers advantages like being lightweight, waterproof, and durable. Consider alternatives for setup like catenary curves. Tyvek can also serve as an emergency shelter option due to its versatility.
Conclusion
Congratulations on building your own lightweight backpacking shelter! By selecting the right fabric, sewing hems, and reinforcement patches, and setting up the shelter with proper tension, you have created a durable and comfortable shelter for your outdoor adventures.
Remember to test out your shelter before heading out on your next backpacking trip to guarantee it meets your needs.
Enjoy the freedom and satisfaction of using a shelter you built yourself!